
DIY Shrinky Dink Christmas Ornaments with Free Printable
This page may contain affiliate links. Learn More.
Learn how to make Shrinky Dink Christmas ornaments with free printable patterns, then watch them shrink up in the oven for a holiday craft. I have fond memories of making Shrinky dinks and watching them shrink up in the oven.

- Find free printable Christmas ornament shrinky dink patterns you can download and use right away.
- Learn what supplies you need to get started with Christmas ornament shrinky dinks.
- Discover creative Christmas shrinky dink ideas to personalize your holiday ornaments.
- Avoid common mistakes so your Christmas shrinky dink ornaments turn out well.
You can even make DIY shrinky dinks. (Free printable garden and Valentine patterns in that post)
Did you know you can make your own Shrinky dink plastic out of stuff you may throw in the trash? Check out what kind of takeout containers will shrink in the oven and make DIY shrinking dinks just like store-bought Shrinky dink plastic by clicking on the highlighted text with free printables above. You can even use plastic cups to make them if you find the right kind. (the brand is polar)
Making homemade gifts helps you simplify Christmas and enjoy it more!
- See the tutorial on how to make a shrinky dink handprint keychain here.
- There are tons of Winter Shrinky Dink ideas in this post for kids to enjoy!
- Check out some fun spring patterns with the luck o the Irish with these St. Patricks day shrinky dink patterns
- Or make these fun 4th of July shrinky dinks to celebrate Independence Day!
- These super cute Halloween Shrinky Dink patterns are fun and spooooooky too!
- These 24 Free Summer Shrinky Dink Patterns are great for summer fun when you have extra time, since school is out and you need some boredom busters!
- And these 24 Free Thanksgiving Shrinky Dink Patterns make fun Thanksgiving memories to share.
- These 24 Free Fall Shrinky Dink Patterns are full of sweaters, leaves, pumpkins and more!
- Kids love these 24 Free Printable Superhero Shrinky Dink Patterns too!
Shrinky dinks Christmas
You can make many fun things for Christmas out of Shrinky dinks. Kids can make gifts such as key chains and necklaces. They can also make fun ornaments to hang on the tree like the ones we made here. The perfect shrinky dink craft for many occasions.

You will need:
- Sharpie markers or colored pencils. (If you choose markers, here are the best markers for Shrinky Dinks to help you get the best results.)
- Shrinky dink plastic (for the best kind click here)
- A sheet tray
- A piece of parchment paper (or aluminum foil)
- Fine grit sandpaper
- Scissors
- Hole punch
- Ribbon
- Oven
- Patterns to use
- Christmas ornament printable
Use these printable patterns to make the cutest Shrinky dink Christmas ornaments. Just download the pdf, choose the page you want to print, and print it out.

Keep reading to download your free templates!

- Use sandpaper to rough up surface of plastic.
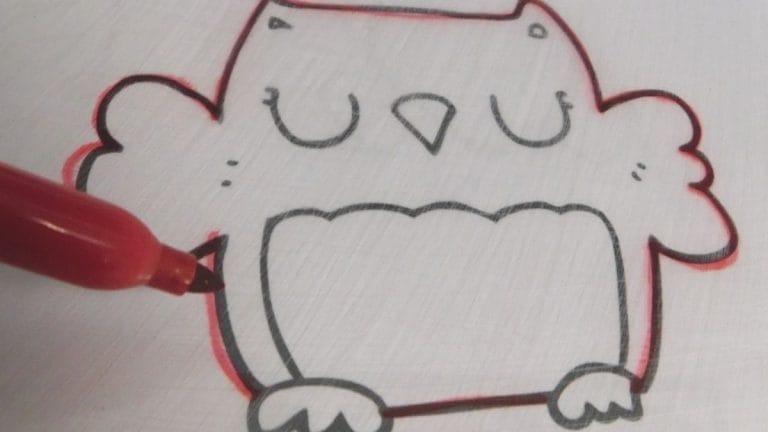
- Lay your Shrinky dink plastic over the top of the pattern and trace the ornament in whatever color you desire.
- Color in the designs as desired.

- Carefully cut out the designs as close to the marker outline as possible.
- Punch a hole in the top of the ornament with a hole puncher.
- Lay the parchment paper on the cookie sheet to protect it.
- Preheat your oven to the temperature listed on your shrink plastic instructions. If you are using DIY shrink plastic from takeout containers. Try 325 and see if that works well. If you turn the oven up too much, it can make your ornaments curl and stick together, so lower is better. My plastic said 275, so I used that setting.
- Arrange Shrinky dink Christmas ornaments on the tray making sure they don’t touch.
- Carefully place in the oven and closely watch. It should take 3-5 minutes for the ornaments to shrink.
- Allow ornaments to cool.
- Thread a strand of ribbon through the hole and tie a knot to make a hanger.


For more Free Shrinky Dink Templates (Printable) check this out.
Shrinky dink Christmas ornaments
Remember that Shrinky dinks shrink, so if you want a larger ornament, blow up your pattern a bit larger, maybe 50%. These ornaments are 2-3 inches in height after baked.
Another idea for Christmas ornaments would be to use old Christmas cards and color a design over the top of the one on the card.
Some printers (as long as they don’t use heat) can be used to print right on the shrink plastic, so you could run your sheets through your printer if you have a cool printing printer.
Cat Christmas ornaments
This cute little cat Christmas ornament is one of my favorite patterns. It’s going to be so cute on my tree this year. It’s always hard to find cat stuff in the stores, there are always dogs, but never cats. So, I love that I can make one myself like this one my daughter made. (And she took the photos, Everchange Productions, so photo cred goes to her too!)

Even though she is grown, we are still making fun memories with Shrinky dinks. I think I’m a pretty lucky mom.
I hope you will make Shrinky dinks for many occasions and make good memories with them too.
For more ornament ideas, check out twig star ornaments, superhero ornaments, and clear glass ornament ideas. And don’t forget these Popsicle Stick Snowflake Ornaments. And also these Pom pom Christmas tree ornaments.
And for more think kids can make, check out these other Christmas gifts that kids can make themselves.
And check out this fun printable Christmas scavenger hunt for kids to do!
For more special day ideas, check out these home daycare crafts and activities for special holidays can help make your celebrations fun!

How Long to Bake Shrinky Dinks
Most Shrinky Dinks bake in only a few minutes, but the exact time depends on the brand, thickness, size of the pieces, and type of oven. Always follow the temperature printed on your shrink-plastic package first.
For traditional Shrinky Dinks, a helpful starting point is 325°F for 1 to 3 minutes. The plastic will curl dramatically before relaxing and flattening. Once it lies flat, bake it for about 30 additional seconds to finish the shrinking process.
Shrinky Dink Baking-Time Chart
| Plastic or project type | Starting temperature | Approximate time | How to tell it is finished |
|---|---|---|---|
| Thin commercial shrink film | 300–325°F | 1–2 minutes | The piece finishes curling and lies nearly flat |
| Standard Shrinky Dinks sheets | 325°F | 1–3 minutes | The piece flattens and stops getting smaller |
| Thicker craft shrink film | 300–325°F | 2–4 minutes | The entire piece is flat, firm and evenly shrunk |
| Large or long ornaments | 300–325°F | 2–5 minutes | The center and edges have finished moving |
| Recycled No. 6 plastic | 325–350°F | 30 seconds–3 minutes | The piece stops shrinking and settles flat |
| Toaster oven | Package temperature | Usually 1–3 minutes | The piece curls, flattens and stops moving |
| Convection oven | About 25°F below conventional setting | Begin checking at 45–60 seconds | The piece has flattened without blowing around |
These times are guidelines rather than guarantees.
Do not remove a piece simply because it curls. Curling is a normal part of the process. Wait for it to uncurl and flatten before deciding it is finished.
How to Cook Shrinky Dinks in the Oven
Although we often say “cook Shrinky Dinks,” you are actually heating the plastic until it contracts and becomes thicker.
- Read the instructions included with your specific shrink film.
- Preheat the oven completely. Do not place the pieces in a cold oven.
- Line a flat metal baking sheet with parchment paper or a heat-safe silicone baking mat.
- Place the ornaments colored-side up with space between them.
- Put the tray on the center oven rack.
- Watch the pieces through the oven window as they shrink.
- Allow them to curl, twist and then flatten.
- After the pieces flatten and stop shrinking, leave them in for approximately 30 more seconds.
- Have an adult remove the tray with oven mitts.
- If necessary, place another sheet of parchment over the hot ornaments and press them gently with a flat spatula or smooth, heat-safe object.
- Let the ornaments cool for three to five minutes before handling them.
Shrinky Dinks should not be heated in a microwave. Conventional and toaster ovens provide the steady surrounding heat needed for the plastic to shrink properly.
Shrinky Dink Temperature and Shrink-Time Troubleshooting
The ornament curled and never flattened:
It may have been removed too early. Return it to the oven briefly and watch to see whether it relaxes. Long, narrow shapes are especially likely to curl. Baking them at the lower end of the package’s temperature range can slow the process and reduce distortion.
The ornament folded over and stuck to itself:
Use metal tweezers or another suitable utensil to separate it carefully while it is warm, then return it to the oven. Adults should handle this step because the plastic and pan are hot.
The ornament developed bubbles:
The oven may have been too hot, the decoration may have been applied too thickly, or the film may not be intended for oven shrinking. Reduce the temperature and test a scrap before baking more ornaments.
The piece is still flexible after cooling:
It may not have finished shrinking. Reheat it briefly until it stops moving and becomes flat.
The ornament came out wavy:
Cover the hot ornament with parchment paper and press it with a flat spatula immediately after baking. Do not press directly with your hands.
The ornaments are shrinking unevenly:
Place similar-sized pieces together, avoid crowding the pan and confirm the oven temperature with an oven thermometer. A test square can help you learn how a particular package of film behaves before baking the children’s finished artwork.
Parchment Paper, Silicone Mats
Parchment paper is inexpensive and makes it easy to lift finished ornaments from the pan. A heat-resistant silicone baking mat can also provide a reusable, nonslip surface that encourages flat, even shrinking. A science activity from the Maryland Science Center lists either parchment or a Silpat-style mat as a suitable baking surface.
Toaster Oven vs. Convection Oven vs. Conventional Oven
Conventional oven
A conventional oven usually provides the most predictable results when making several ornaments at once. Place the tray on the center rack and use the temperature listed on the package—often around 325°F. Standard pieces generally finish in one to three minutes.
Toaster oven
A toaster oven works well for small batches and makes it easy to watch the pieces. Use the bake setting, preheat it completely and keep the tray away from exposed heating elements. Because the oven cavity is small, the plastic may shrink faster than it does in a full-size oven.
Begin watching immediately and never leave it unattended. Do not use a toaster oven that forces the plastic dangerously close to the heating elements.
Convection oven
A convection fan can make lightweight pieces slide or blow around. If the manufacturer permits convection baking, lower the temperature by approximately 25°F and begin checking earlier than you would in a conventional oven.
Cover the ornaments loosely with a second piece of parchment or vellum if necessary to keep them from moving. Do not use a heavy pan to trap the plastic or prevent yourself from seeing whether pieces have folded together.
A conventional oven is usually the easiest choice for a group of children’s ornaments because the gentler airflow produces more consistent results.
Shrinky Dink Ornament Size Chart
Shrink percentage is determined primarily by the type and brand of plastic—not by choosing a hotter oven temperature. A hotter oven may shrink the plastic faster, but it should not be used to control the finished size.
Commercial products vary considerably. Some films shrink to approximately one-half of their original width and height, while others may finish closer to one-third. Always test a measured scrap from a new package before sizing important designs.
| Original pattern size | Finished at 50% | Finished at 40% | Finished at 33% |
|---|---|---|---|
| 2 inches | 1 inch | 0.8 inch | ⅔ inch |
| 3 inches | 1½ inches | 1.2 inches | About 1 inch |
| 4 inches | 2 inches | 1.6 inches | About 1⅓ inches |
| 5 inches | 2½ inches | 2 inches | About 1⅔ inches |
| 6 inches | 3 inches | 2.4 inches | About 2 inches |
| 8 inches | 4 inches | 3.2 inches | About 2⅔ inches |
To calculate your own estimate:
Original size × expected shrink percentage = approximate finished size
For example, a 5-inch pattern made with film that finishes at 40% of its original dimensions should produce an ornament about 2 inches tall.
Because shrink film does not always contract perfectly proportionally, circles may become slightly oval and rectangles may change shape. Test the plastic before making photo frames, matching sets or designs that require precise measurements.
How to Make Holes in Shrinky Dinks
Always punch hanger holes before baking. Once the plastic has shrunk and hardened, trying to punch or drill it can cause cracks.
A standard single-hole paper punch, generally about ¼ inch, works well for most ornaments. The hole will shrink along with the design, leaving a smaller opening suitable for narrow ribbon, thread or a jump ring. A standard paper punch is recommended for most Shrinky Dink projects.
For a larger ribbon, make two overlapping holes before baking to create a small oval. Do not place the hole too close to the edge. Leave at least ¼ to ½ inch of unbaked plastic between the hole and the outer edge, depending on the size and shrink ratio of the ornament.
Use these approximate starting points:
| Intended hanger | Hole before baking | Finishing option |
|---|---|---|
| Thread or fishing line | ⅛–¼ inch | Tie directly through the cooled ornament |
| Thin ribbon | ¼ inch | Thread with a needle or ribbon tool |
| Narrow cord | ¼ inch | Use directly or add a jump ring |
| Wider ribbon | Two overlapping ¼-inch holes | Thread carefully after cooling |
| Metal ornament hook | ¼ inch | Add a small jump ring first |
Tiny metal eyelets can reinforce holes used with thin ribbon, but install them after the ornament has baked and cooled. Metal eyelets placed in the plastic before baking may prevent even shrinking or distort the hole. Choose an eyelet that fits the finished opening without forcing it through.
Using Cookie Cutters for Shrinky Dink Ornaments
Cookie cutters make handy pattern templates. Place a cutter on paper, trace around it and then slide the paper pattern beneath the transparent shrink film. This works especially well for stars, gingerbread people, trees, bells, mittens and simple ornament shapes.
Most cookie cutters are not sharp enough to cut shrink plastic cleanly. Use scissors to cut around the traced line and round any sharp corners, since points and corners can become sharper after baking.
Remember to enlarge the shape according to the shrink ratio of your plastic. A cookie cutter that measures 4 inches may create a finished ornament only 1½ to 2 inches tall.
Can Shrinky Dinks Be Painted Before Baking?
Some shrink-film products accept a very thin coat of acrylic paint or acrylic paint pens, but thick paint can bubble, crack or flake as the plastic shrinks. Check the instructions for your particular film before using any paint.
For the most dependable results:
- Use a thin, even layer rather than dimensional paint.
- Leave some plastic visible instead of covering the entire piece heavily.
- Allow the paint to dry completely before baking.
- Test the paint and plastic together on a small scrap.
- Avoid oil paint, crayons and waxy art supplies.
- Remember that colors become darker and more concentrated after shrinking.
- Apply paint to the sanded or frosted side when the package directs you to do so.
Paint pens generally give more controlled coverage than brushed acrylic paint. If you want a heavily painted appearance, bake the plain or lightly colored ornament first and apply the acrylic paint afterward.
Can I Add Glitter Before Baking?
Loose glitter and thick glitter glue are better added after baking. Glitter glue can bubble, scorch or prevent part of the plastic from shrinking evenly. Loose glitter may blow around a convection oven or attach poorly to the finished surface.
Let the baked ornament cool, brush on a thin layer of clear craft glue, add glitter and allow it to dry. Finish with a compatible clear sealer if desired. Keep glitter away from the hanger hole so the ribbon will slide through easily.
Are Shrinky Dinks Safe to Bake in a Home Oven?
Commercial shrink film should be used only according to its package instructions and with adult supervision. Use a conventional or toaster oven when approved by the manufacturer; never use a microwave.
Open a window or run the kitchen exhaust fan for ordinary ventilation, keep children away from the hot oven and avoid leaning directly over it when opening the door. Do not bake food at the same time as the craft.
Use only shrink film sold for crafting or clean, clearly identified No. 6 plastic when following a reliable recycled-plastic project. Do not experiment with unidentified plastic because different plastics react differently to heat.
Stop heating immediately if the plastic smokes, burns or creates a strong burning odor. That usually indicates excessive heat, an unsuitable material or an ornament that has been left in too long. Allow the area to ventilate before continuing.
Use a craft-designated lined tray when possible, and wash your hands after handling recycled plastic. An adult should operate the oven, remove the pan and flatten any hot pieces.
Will Shrinky Dink Ornaments Stay Intact on a Real Christmas Tree?
Properly baked shrink-plastic ornaments become thicker, lightweight and fairly sturdy. They should remain intact on either a real or artificial Christmas tree when handled normally.
For longer-lasting ornaments:
- Keep them away from hot incandescent bulbs and use cool LED lights.
- Do not hang them where they will rest against a bulb.
- Reinforce the hanger with a jump ring or small eyelet if necessary.
- Seal artwork that might rub, scratch or absorb moisture.
- Avoid placing ornaments on wet branches immediately after bringing a real tree indoors.
- Wrap each ornament in tissue paper before storing it.
- Store them flat in a cool location rather than in a hot attic.
- Do not bend the ornaments when removing them from the tree.
A clear acrylic sealer applied after baking can protect designs that will be handled frequently. Grafix recommends sealing frequently handled shrink-film projects after baking.
Shrinky Dink Ornament Ideas for Christmas Gifts
Personalized name ornaments
Trace a large ornament, stocking, star or Christmas tree and add the recipient’s name and year. Make the letters bold because very thin lines become difficult to read after shrinking.
Christmas gift tags
Create reusable gift tags with names such as “Mom,” “Grandma” or “Aunt Sarah.” Punch a large hole before baking and tie the finished tag to a package with ribbon. After the gift is opened, the tag can be hung on the tree.
Family photo keepsakes
Use shrink film specifically labeled for inkjet printing. Do not place ordinary shrink plastic in a printer, and never run plastic through a laser printer because laser printers use heat.
Brighten the photograph before printing because the colors become more concentrated as the image shrinks. Add the year and a short message before baking. A photo ornament featuring a child, grandchild, pet or family home makes a meaningful gift for grandparents.
Children’s artwork ornaments
Reduce or trace a child’s drawing onto shrink plastic. Preserve the child’s original colors, handwriting and charmingly uneven lines. Write the child’s name and age on the back before baking.
Family ornament sets
Make coordinating ornaments for every family member using the same outer shape but different names, colors or illustrations. Cats, dogs, favorite foods, hobbies and family jokes can make each ornament personal.
Handwriting keepsakes
Ask a child to write “I love you,” sign their name or draw a tiny picture on a large piece of shrink film. Once baked, the handwriting becomes a small permanent keepsake that grandparents can hang on the tree each year.